These rapid-rise skillet rolls are the perfect go-to when you’re short on time but still want soft and fluffy dinner rolls on the table. These are easy to make and while you certainly could use a stand mixer, it’s not required! All you need is a bowl, a spoon, and a little bit of muscle to put this dough together. A cast iron skillet adds a crispy bottom crust, but if you don’t have one, a regular 9×13 pan works just as well!
For other delicious and easy breads try our Jalapeño Cheese Bread or Rustic Garlic Parmesan Herb Bread.
Why Our Recipe
- Ready in just an hour, these rolls are a perfect alternative if you need dinner rolls on the table fast!
- A little honey is used to add sweetness and help make the tops golden brown.
- No stand mixer is required, plus you can bake them in a skillet or a 9×13 pan.
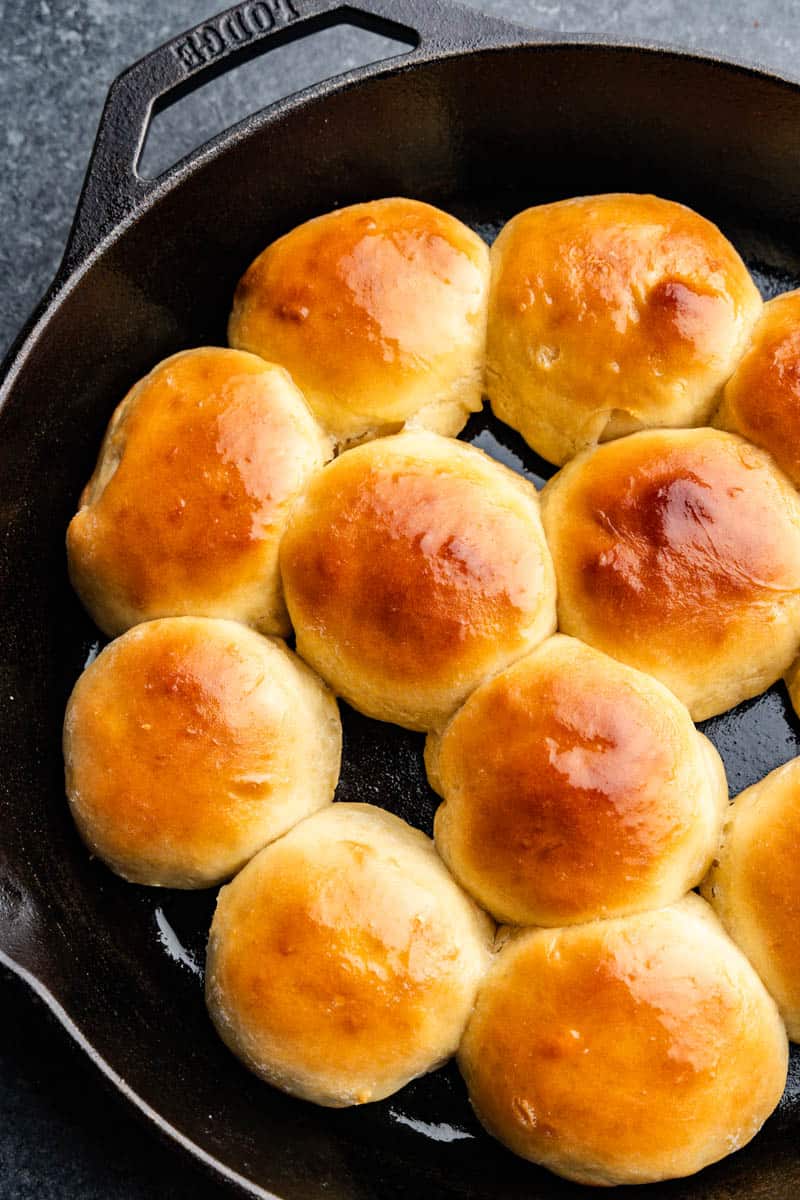
Our Best Homemade Dinner Rolls Ever have been made in millions of homes across the globe. They are absolutely heavenly, but we understand that sometimes you just don’t have three hours to make dinner rolls! If that’s the case for you, this is a quick yeast roll recipe that will get you delicious rolls on nights when you might not have as much time.
Ingredient Notes
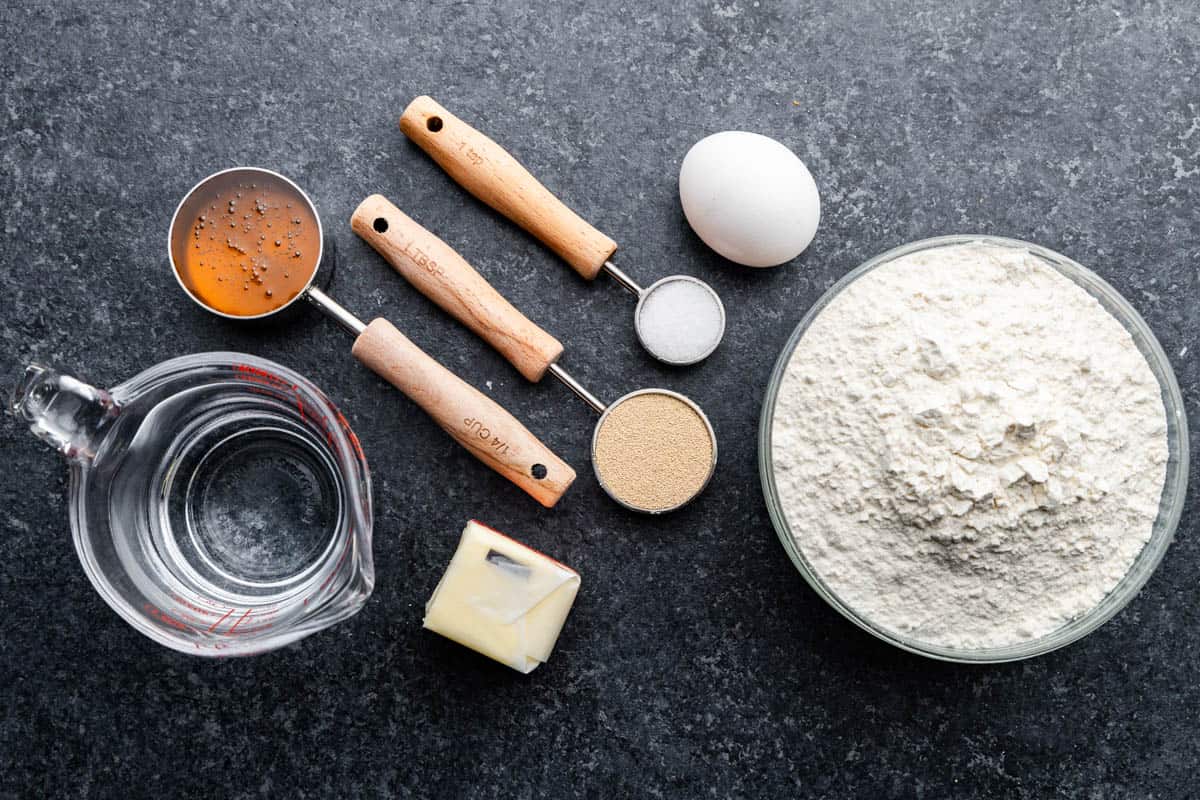

- Instant yeast: The best yeast to use in this recipe is instant dry yeast, but it might also be called rapid-rise yeast, quick yeast, or instant yeast in the stores.
- Warm water: Be sure that you use warm water not hot water, otherwise the heat could kill your yeast. If the water is too hot for you to touch, it’s too hot for the yeast!
- Honey: The honey adds flavor, but you could also use regular granulated sugar in the same amount.
- Butter: Make sure the butter is melted for easier incorporation into the dough.
- All-Purpose Flour: Start with 2 1/2 cups and add more as needed. The exact amount may vary based on humidity and how you measure flour, but aim for a soft dough that’s tacky, but not sticky enough to stick to your hands. You can also use bread flour.
Instant Dry Yeast
Instant dry yeast is very similar to active dry yeast. They can be used interchangeably in recipes, but instant dry yeast has a smaller granule and doesn’t need to be dissolved in water before using it. It will begin to work in the recipe instantly, which cuts down on the rising time. That makes instant dry yeast ideal for easy bread recipes like these rolls!
Use a 9×13 Instead of a Skillet
If you don’t have a cast iron skillet, no worries! A 9×13 pan will still give you beautifully baked, soft, and fluffy rolls. Simply shape the dough into 12 rolls and arrange them evenly in a lightly greased 9×13 pan.
The rolls may not get as crispy on the bottom as they would in a cast iron skillet, but they will still bake up perfectly golden brown on top and soft inside. Keep an eye on them during the last few minutes of baking since different pans can result in slightly different bake times. A light aluminum or glass 9×13 pan might require an additional few minutes, while darker pans may not need any additional time.

Proofing Your Bread
This recipe does not require you to proof your bread, but it may come in handy during winter months and cooler weather where your house may not be ideal enough for a rapid rise. The rising time, however, may increase beyond 20 minutes if your house runs on the cooler side.
Since this is a smaller recipe, you can proof your bread quickly by microwaving a cup of water until it is steaming, and then adding the dough to the microwave. Try to get it into the microwave quickly so the steam doesn’t escape, and don’t open the door until it’s finished proofing.
If you’re making a larger bread recipe, or if you have a smaller microwave, you can proof your bread in the oven. Just heat your oven to 150 degrees, then turn your oven off and place the dough in the oven and close the door. That first blast of heat will help your dough rise quickly, and the oven will continue to stay warm long enough for your dough to rise.
Storage Instructions
Let your rolls cool completely before storing them in an airtight container at room temperature for up to 5 days.
For more great bread recipes . . .
Trending Products

GE Electronic Window Air Conditioner 6000 BTU, Efficient Cooling for Smaller Areas Like Bedrooms and Guest Rooms, 6K BTU…

Alen BreatheSmart Classic H13 HEPA Air Purifier, Air Purifiers For Home Large Room w/ 1100 SqFt Coverage, Medical-Grade…
Honeywell Portable Air Conditioner w Heat Pump, Dehumidifier & Fan, Cools & Heats Rooms Up to 700 Sq. Ft. w Remote…
Luminance Midway Eco LED Ceiling Fan with Light and Remote | Dimmable 54 Inch Fixture with DC Motor | Contemporary 5…

Nostalgia RF6RRAQ Retro 6-Can Personal Cooling and Heating Mini Refrigerator with Carry Handle for Home Office, Car…


